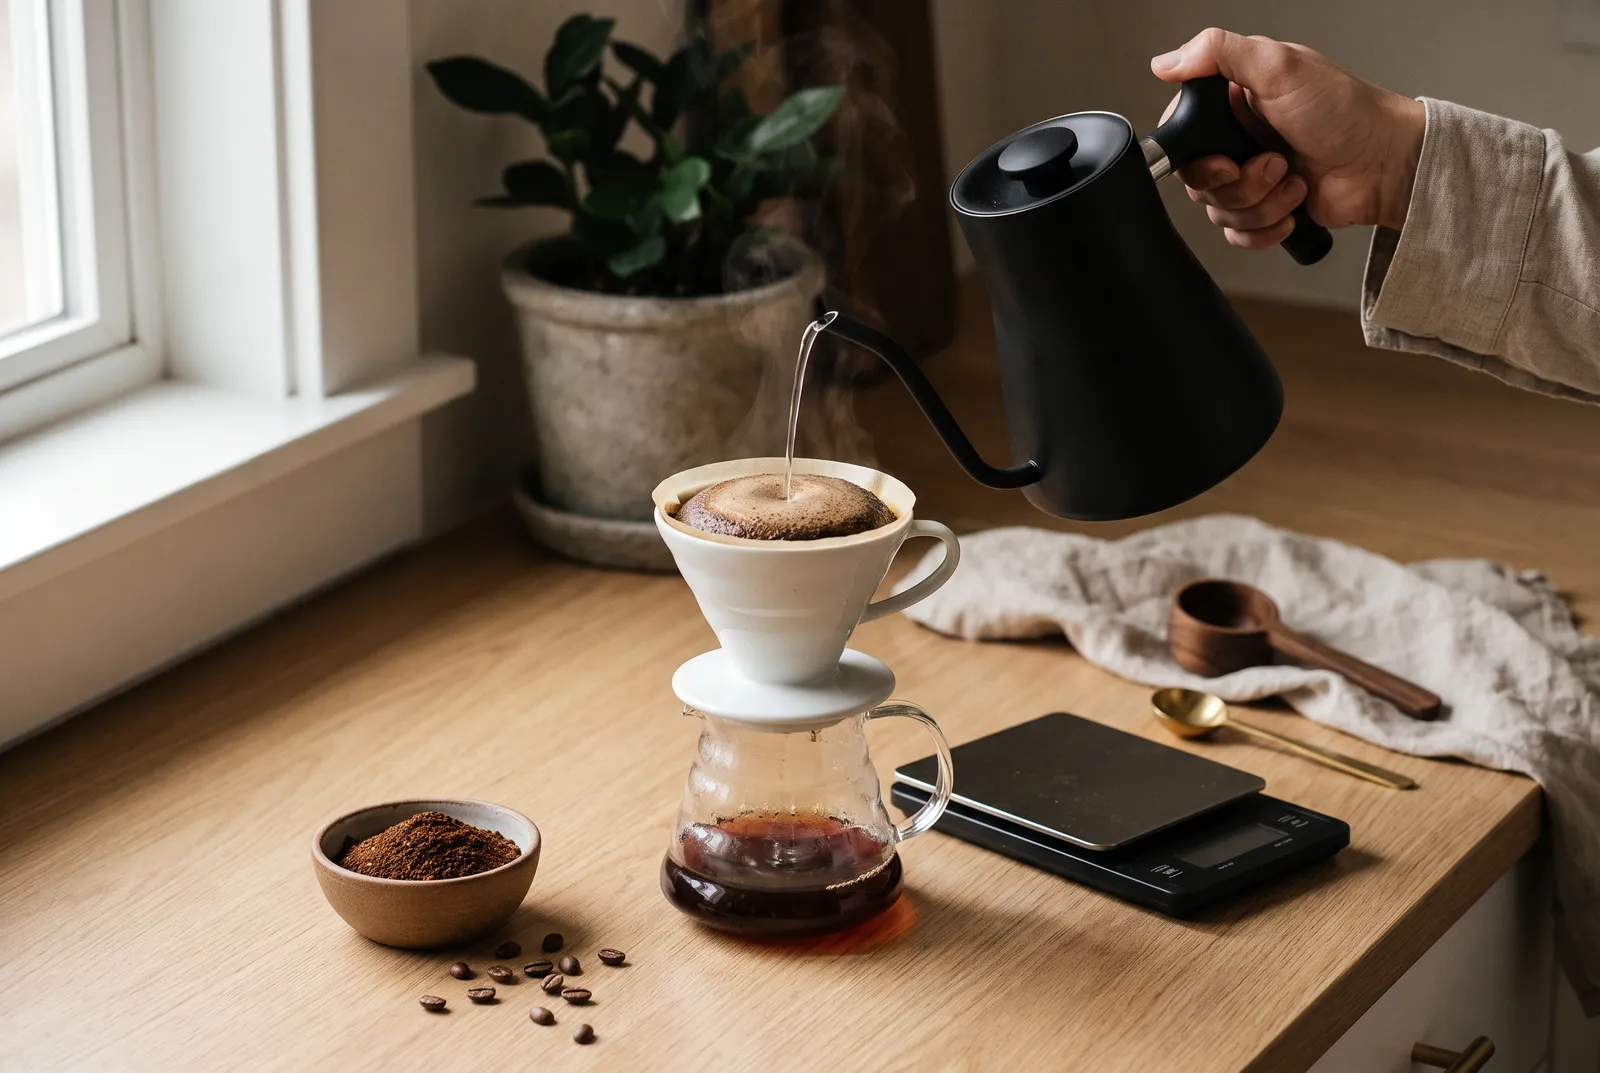
Pour-over is percolation in its simplest form: water flows through a bed of ground coffee and out through a paper filter. Unlike a drip machine, you control every variable, which is both the appeal and the reason so many guides feel fussy. The good news from the research is that a few numbers matter a lot and many others matter very little. Get the ratio, grind and pour consistent and you will make excellent coffee with any decent cone.
What you need
- A dripper and its filters. A Hario V60, Chemex or Kalita Wave all work; see the comparison below and our coffee makers and brewers.
- A scale and a gooseneck kettle. Weighing water is the single biggest consistency upgrade. Browse kettles and scales.
- A burr grinder, because pour-over exposes uneven grinds quickly. See grinders.
- Fresh whole beans, ground right before brewing. Start with our whole bean coffee listings.
The numbers that matter
| Variable | Our starting point | Published range | Sources |
|---|---|---|---|
| Ratio | 1:16 (20 g to 320 g) | 1:13 to 1:18 | NCA 1:13–1:16 [1]; Kalita 1:16–1:18 [4]; Baratza guides work out to 1:16 [2][3] |
| Water temperature | 93–96 °C (199–205 °F) | 90–98 °C | NCA 93 ± 3 °C [1]; Kalita 195–205 °F [4]; Baratza V60 98 °C [2] |
| Grind | Medium to medium-coarse | Varies by grinder | Baratza [2]; Kalita compares it to medium-coarse sea salt [4] |
| Bloom | 2–3× the coffee's weight, 30–45 s | 30–45 s | NCA [1]; Baratza [2]; Gagné uses 3× [8] |
| Total time, one cup | 2:30–3:30 | 2–4 min | NCA [1]; Baratza V60 under 3 min [2]; Gagné 2:30–3:30 [8] |
| Total time, 800 g Chemex | About 5 min | Baratza [3] |
Ratio: your strength dial
Ratio is grams of water per gram of coffee, and it mostly sets strength. The NCA recommends 1:13 to 1:16 [1], Kalita suggests 1:16 to 1:18 [4], and Baratza's V60 recipe (20 g to 320 g) and Chemex recipe (50 g to 800 g) both land on 1:16 [2][3]. Gagné, the astrophysicist behind the Coffee ad Astra blog, brews 22 g with 352 g of water, also 1:16 [8].
There is no single correct strength. A UC Davis consumer study found black-coffee drinkers split into two groups whose preferences varied most with brew strength [10]. Start at 1:16, then move to 1:15 if the cup tastes thin or 1:17 if it feels heavy.
Water temperature: less critical than you think
Recommendations range from 93 ± 3 °C [1] to 98 °C [2]. A 2020 UC Davis study tested the question directly: when the researchers held strength and extraction fixed by adjusting grind, dose and flow, brewing at 87, 90 and 93 °C made no appreciable difference to the sensory profile, which was governed by strength and extraction instead [6]. Hotter water is mainly a tool for extracting more efficiently.
Real-world brewing also runs cooler than the kettle. Gagné starts with boiling water because heat is lost on the way to the coffee bed; he notes that brew temperatures rarely exceed about 93 °C, and he uses a plastic V60 because it holds heat better than ceramic or glass [8].
Grind: the extraction dial
Start medium to medium-coarse [2] and let the cup and the drawdown time guide you. Finer grinds extract more and drain more slowly; coarser grinds do the opposite.
Step by step: a single cup
This recipe fills one large mug.
- Heat the water to roughly 93 to 98 °C.
- Rinse the filter. Pour hot water through the empty paper filter and discard it. Rinsing removes papery taste and preheats the brewer [8]. In Gagné's filter tests, unbleached paper shed measurable solids into rinse water while bleached Hario filters did not, so rinsing matters most with brown filters [9].
- Grind 20 g and add it to the filter. Shake gently to level the bed. Gagné also digs a shallow trench in the center with a finger to avoid a dry spot in the middle of the bed [8].
- Bloom. Start a timer and pour 40 to 60 g of water, wetting all the grounds. Swirl or stir gently so no dry pockets remain [2], then wait 30 to 45 seconds [1][4].
- Pour the rest to 320 g, either in pulses or one slow, continuous spiral (see below). Keep the stream on the coffee, not the paper walls [2].
- Swirl once. When the last water is in, give the brewer a gentle swirl to flatten the bed and knock grounds off the walls. Gagné calls this the Rao spin [8].
- Let it drain. Aim to finish around 2:30 to 3:30 [8]. Swirl the server before pouring, since coffee settles.
Tip: Write down three numbers every time: grind setting, total brew time and a one-word taste note. After five brews you will know exactly which way to adjust.
Why the bloom matters
Roasting traps carbon dioxide inside the bean. According to SCA, that gas leaves rapidly for about the first 20 days after roasting and then slows sharply, while grinding releases in minutes what whole beans lose over weeks. Fresh coffee therefore blooms more vigorously, because the trapped CO2 is released when hot water hits it [7]. Giving that gas 30 to 45 seconds to escape before the main pours helps the rest of the water reach the grounds evenly.
If your coffee barely bubbles, it is probably older or was ground a while ago. It will still brew well; just keep your pours even.
Scaling up, and the water itself
Brewing for two or more? Keep the ratio and scale everything else with it, including the bloom: Baratza's Chemex recipe blooms 50 g of coffee with 100 g of water [3]. Bigger beds drain more slowly, so larger batches usually want a coarser grind. Baratza's own starting points show it: on an Encore ESP, setting 25 for a 20 g V60 versus 30 for a 50 g Chemex [2][3]. Expect a longer total time, too, about five minutes for 800 g in a Chemex [3].
Water is the other ingredient. If your tap water tastes off, it will taste off in your coffee, and filtered water is an easy fix. Enthusiasts go further: Gagné brews with distilled water remineralized to a recipe, keeping alkalinity, hardness and pH within ranges recommended by SCA [8]. You do not need to start there, but if a well-dialed recipe still tastes flat or chalky, water is worth investigating.
Pulse vs. continuous pouring
Both methods work. What matters is doing the same thing every time.
Pulse pouring adds water in several smaller portions. Baratza's V60 guide pours about 100 g at a time in slow concentric circles, waiting roughly 10 seconds between pours [2]; its Chemex guide uses five 140 g pours after the bloom [3]. Kalita describes circling in the remaining water in increments [4]. Pulses are easier to control and keep the bed from flooding.
Continuous pouring keeps a slow, steady stream going. The NCA recommends a slow, continuous pour starting in the middle and spiraling outward [1]. Gagné prefers two large pours over many small ones and warns that tiny batches let the slurry cool well below 91 °C [8].
Whichever you choose, agitation is the hidden variable. Baratza suggests pouring delicately when a brew runs slow, and adding pouring energy or longer pauses when a cup tastes sharp or underdeveloped [2].
V60 vs. Chemex vs. Kalita Wave
| Hario V60 | Chemex | Kalita Wave | |
|---|---|---|---|
| Brewer shape | Cone with one large opening | Glass carafe with built-in cone | Flat bottom with three holes [5] |
| Filter | Thin paper cone | Thick bonded paper that removes more oils and fines [3] | Fluted 20-wave paper [5] |
| Filter flow in Gagné's test | Tabbed 11.03 mL/s; tabless 6.89 mL/s [9] | Bleached 7.23 mL/s [9] | Not tested [9] |
| Reference recipe | 20 g to 320 g at 98 °C, under 3 min [2] | 50 g to 800 g at 205 °F, about 5 min [3] | 20 g to 320 g at 195–205 °F, 2–3 min [4] |
| Our take on the cup | Clear and lively; rewards good technique | Very clean, lighter body; great for batches | Even and sweet; forgiving for beginners |
Brewer geometry is more than aesthetics. One project from the UC Davis brewing research program, written up for SCA, concluded in its headline that basket shape is as important as grind size in drip brewing [10]. Kalita credits its flat-bottom, three-hole design and wave filters with more even extraction [5], while the V60's single large opening puts more of the flow rate in your hands, through grind size and pouring.
Filters matter, too. Pores larger than about 20 microns carry most of the flow, and bleaching appeared to worsen pore uniformity in Gagné's analysis [9]. If you switch filter brands, expect to adjust your grind.
Troubleshooting
| Symptom | Likely cause | What to try |
|---|---|---|
| Sour, sharp or thin; drained fast | Underextraction | Grind finer; add pouring energy or longer pauses [2]; use hotter water [3] |
| Bitter, heavy or drying | Overextraction or too strong | Grind coarser; pour gently and agitate less after the bloom [2]; try slightly cooler water [3] |
| Very slow drawdown, hollow or bland | Fines clogging the filter | Grind coarser, pour gently, keep the bed from drying out; try thinner filters [2] |
| Weak but otherwise balanced | Ratio too long | Use more coffee, for example 1:15 |
| Papery or cardboard taste | Unrinsed filter | Rinse with hot water first [8][9] |
| Grounds stuck high on the walls | Uneven bed | Finish with a gentle swirl [8] |
Strength deserves special attention. In the UC Davis temperature study, total dissolved solids had the strongest effect on flavor: bitterness, astringency and body rose with strength, and sourness shifted by about 20 points on the 100-point scale across the range tested [6]. Change the ratio to fix strength, and the grind to fix extraction.
Bottom line: Weigh everything, start at 1:16 with water in the low to mid 90s Celsius, bloom for 30 to 45 seconds, and pour the same way every time. Then adjust one variable, usually the grind, until the cup tastes sweet and clear.
Curious how we judge coffees and gear? Read how we score, or explore the directory.
FAQ
What is the best coffee-to-water ratio for pour-over?
Start at 1:16, such as 20 grams of coffee to 320 grams of water, which is what Baratza's V60 and Chemex guides work out to. If the cup tastes thin, move toward 1:15; if it feels heavy, try 1:17. Published ranges run from 1:13 to 1:18, and UC Davis research found consumers split into groups with genuinely different strength preferences.
Do I need a gooseneck kettle?
It is not mandatory, but it makes pour-over far easier. A gooseneck lets you pour a thin, steady stream exactly where you want it, which controls agitation, keeps water off the filter walls and makes your brew times repeatable. With a regular kettle, pour slowly in smaller additions and expect more variation from cup to cup. A scale matters even more than the kettle.
Why doesn't my coffee bloom much?
The bloom is carbon dioxide escaping from the grounds, and roasted coffee loses that gas over time. SCA notes that degassing is rapid for roughly the first 20 days after roasting and slows sharply afterward, and that ground coffee loses gas in minutes. A weak bloom usually means older beans or coffee ground well before brewing. It still brews fine; just pour evenly.
Should I use boiling water for pour-over?
You can. Water cools as it leaves the kettle and hits the grounds, so the slurry ends up well below the kettle temperature, and some careful brewers start at a boil for that reason. Guides range from 93 plus or minus 3 °C to 98 °C. If your coffee tastes bitter, try cooler water; if it tastes sour or thin, go hotter or grind finer.
References
- [1]Pour-over coffee — National Coffee Association
- [2]Hario V60 Brew Guide — Baratza
- [3]Chemex Brew Guide — Baratza
- [4]The Kalita Pour-Over Method for Exceptional Coffee — Kalita USA
- [5]Wave Series — Kalita USA
- [6]Brew temperature, at fixed brew strength and extraction, has little impact on the sensory profile of drip brew coffee — Scientific Reports, via PubMed Central
- [7]Coffee Decoded: What is “freshly roasted” coffee? — Specialty Coffee Association
- [8]How to Brew Better Coffee with a V60 — Coffee ad Astra (Jonathan Gagné)
- [9]An In-Depth Analysis of Coffee Filters — Coffee ad Astra (Jonathan Gagné)
- [10]Brewing Fundamentals — Coffee Science Foundation and UC Davis Coffee Center
Discussion
What do you think?
No discussions yet.
Own this article? Ask a question or share your recipe — you’ll be the first.